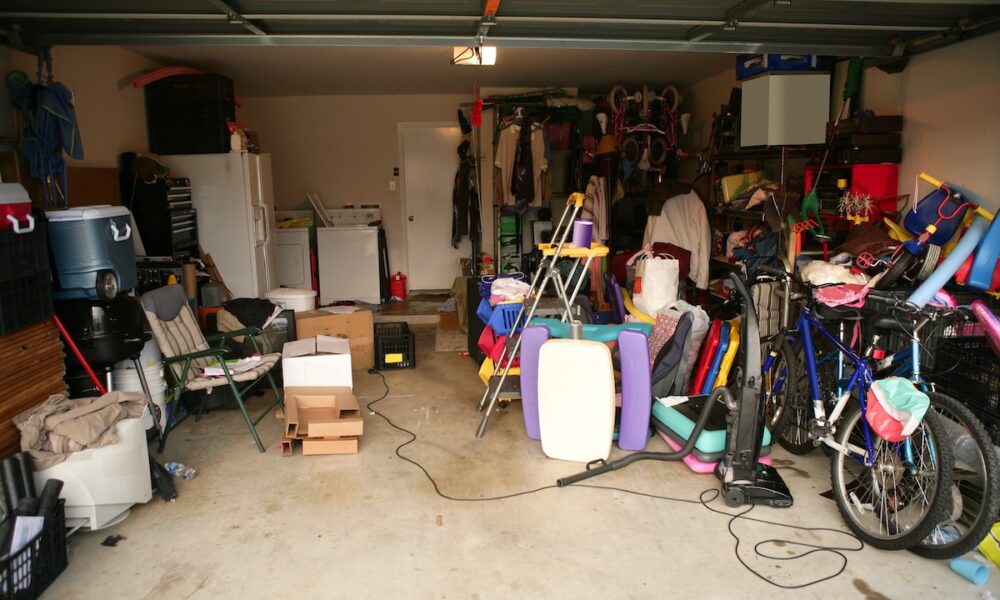
There’s something about garages that makes people want to fill them up with garage clutter. This is often to the point where they can’t even park their cars in them. After all, what other room in the house is so well-suited to being filled to the brim with old boxes, broken furniture, and piles of unwanted junk? Out of sight, out of mind. But wouldn’t it be nice to get rid of garage clutter?
If you have a garage that is unusable because it’s piled high with boxes and “stuff” it’s time to reclaim this valuable space. Imagine having a designated room to work on home projects, exercise, entertain or even just keep your car safe from the harsh Tampa Bay weather.
Fortunately, cleaning your garage doesn’t need to be as difficult as you might think. In fact, with a bit of planning and organization, it can be a relatively quick and painless task to get your garage back into shape.
Wondering where to begin? This article is a good place to start. We’ll guide you step by step through the often overwhelming task of cleaning out your garage.
1. Make a Game Plan
The best way to attack a dauntingly large project like this is to make a plan and identify a goal. If you try to just go in and start moving boxes around you’ll easily become overwhelmed. Before you dive in, take a moment to do the following:
- Define your goal- What does your dream garage look like? How would you like to be able to use the space? Having well-developed answers to these questions will help to guide you as you sort and keep you motivated through the hard work. For example, if you plan to transform your garage into a workshop you might want to keep an eye out for old tools as you sort. Like to work out? Picturing an amazing home gym in your garage might be easier to part with those boxes of old trophies.
- Set some rules- Maybe you vow to throw away anything that is broken. Maybe you limit yourself to only 3 boxes of holiday decorations. Whatever guidelines you set for yourself make sure that they are reasonable and that they help you reach your goal.
- Establish a schedule- Some people work best when they tackle an entire project in one weekend. Others prefer to devote an hour each evening to complete their task over weeks. However you decide to attack your messy garage, set a schedule for yourself, and adhere to your deadlines.

2. Gather Your Supplies
Nothing stalls progress like having to stop to run to the store for supplies. Take a moment to gather up everything you need before you get started. Some basic supplies you might need are:
- Storage boxes- At the very least you’ll need some cardboard boxes, but consider purchasing some durable plastic totes. Cardboard can bend and tear and it’s vulnerable to moisture, bugs, and rodents. Plastic storage totes with lids stack nicely, can be color-coded for organization, and are durable enough to protect your belongings.
- Garbage bags- Lots of garbage bags. Forget those flimsy kitchen trash liners, for a project like this you’ll need large durable contractor bags.
- Cleaning supplies- Things like; rubber gloves, a scrub brush, a broom, a mop and bucket, disinfectant cleaners, bleach, mold and mildew remover, a ladder for hard-to-reach areas, glass cleaner if you have windows, and a vacuum for dust and cobwebs. Decide if you will need items like mousetraps and bug repellant to rid the area of pests.
- Adequate garbage space- Make sure that your outdoor garbage receptacle can handle some extra trash. If your garage is particularly large or cluttered you may even consider renting a dumpster.
- Organizational elements- Refer back to your plan and decide what type of organization you will need to achieve your goal. Customized cabinets for power tools, sporting equipment, and hazardous chemicals? Slatwall systems for bikes, hand tools, and gardening supplies? Overhead storage for ladders, camping gear, and holiday decorations? Unsure what you might need to achieve your dream garage? Contact The Smarter Garage for help and ideas.
3. Sort into Keep, Donate, and Toss
Time to dive in! Establish 3 zones; Keep, Donate, and Toss. Start in one corner of your garage and begin sorting, working methodically around the room. This helps you stay organized and it’s incredibly rewarding to see the progress accruing behind you.
Refer back to the “rules” that you defined back in your planning stage, this will help guide you as you sort.
Here are some tips to help you through this process:
- Keep- This zone is for, obviously, things you plan to keep. Keep only the items that you still have use for or that are too precious to part with. Before placing an item in this zone take a moment to wipe it clean and make sure that it’s still in good working condition.
TIP: Items in the “keep” zone should be grouped according to category (tools, sporting equipment, camping supplies) and placed directly in a labeled plastic storage box or separated into piles to be placed on shelving or in cabinets.
- Donate- This zone is for items that are in good shape but you have no use for. Things like that tennis racquet you used twice, the bike your child outgrew, and the holiday decoration overflow that surpassed your 3-box rule. Be sure the item is clean and functional and then stick it in a cardboard box or bag to be sold in a yard sale, given to friends, or taken to the charity of your choice.
TIP: Remember that just because it has sentimental value to you, doesn’t mean that it will be useful to a stranger. Avoid donating items that will need to be thrown out by the facility.
- Toss- This zone is for garbage; broken items, clothes from the disco era, VHS tapes, and floppy discs. Put these items directly in a garbage bag and take the bag outside as soon as it becomes full, don’t let garbage bags dominate your valuable new space.
TIP: Be firm with yourself. Are you really going to fix that old blender? Probably not. Throw it away.
4. Scrub Your Garage
Now that you’ve sorted through everything and gotten rid of garage clutter you don’t need, it’s time to clean. Garages are notoriously dirty spaces, but cleaning them is a fairly simple process.
Start at the top and work your way down, saving the floors for last, so you don’t wipe dust and debris onto a clean surface.
- Use a broom or long-handled vacuum attachment to nab dust and cobwebs from the ceiling, rafter, and walls.
- Clean garage walls with a scrub brush and cleaning solution, then simply spray with a garden hose to rinse them clean.
- Watch for any areas of mold or mildew and treat them with an appropriate spray.
- Clean windows thoroughly and vacuum debris from the sills.
- Mop the floor clean or spray it with a hose depending on your floor material.
5. Create the Garage of Your Dreams (without Garage Clutter)
Now that your garage is emptied, decluttered and squeaky clean take a moment to stand back and admire your work. Think back to your plans for your dream garage and evaluate what you need to do to make that dream a reality.
Do your walls need a fresh coat of paint? Would an electric door opener make life easier? How about your floors, would a polyaspartic coating make your new space more user-friendly? If you’re going to upgrade your garage now is the time to do it!
Finally, it’s time to start re-assembling your garage. Slide your totes neatly into your overhead storage, hang your tools on your Slatwall, and fill your cabinets with your sporting equipment- all organized so you know exactly where to find it when you need it.
Now for the fun part- relax and enjoy your space without garage clutter!
Get Rid of Garage Clutter: Storage Solutions for Your Garage
If you want a neat, organized garage can add valuable living space to your home. It can give your room to work on projects, exercise, entertain or even just park your car.
The key to a functional garage space is having storage solutions that fit your needs and lifestyle. If you are ready to take the plunge and reclaim your garage, call the garage experts at The Smarter Garage. We can evaluate your space, discuss your needs and install products to help you achieve your dream garage.

